Here is Dev Victor, Ethereum smart contract researcher and enthusiast. Even we are focusing on Honeypot tokens much, but we will also talk about how to create a normal token like a very popular Meme coin, for example, PEPE token. A normal token is not a honeypot, which the token can be buy and sell normally in decentralized exchanges.
So today, let me introduce you some useful tips on How to Create Your Own Meme Token like PEPE token. Are you ready?
[Only for research and testing, don’t try to scam using this method]
Normal Token(Non-Honeypot Tokens, Completely Safe to Invest and Trade, Easy to Deploy, Easy to Gain Trusts and Confidence from Crypto Traders and Investors)
Part 1: Use REMIX and Metamask to create token
1. First, install the Metamask wallet https://metamask.io/ in your computer and create account/ wallet.
2. Browse Remix IDE http://remix.ethereum.org/ You need to use Remix IDE to deploy smart contract.
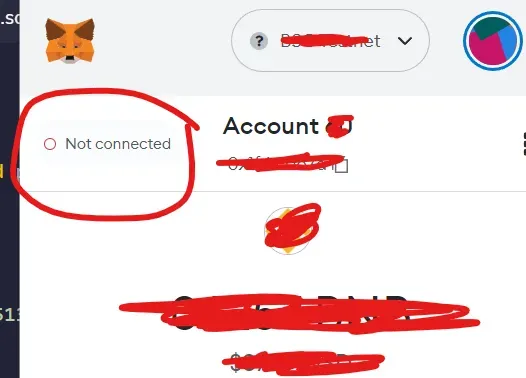
3. Connect metamask to REMIX IDE. Click your metamask pluggin.
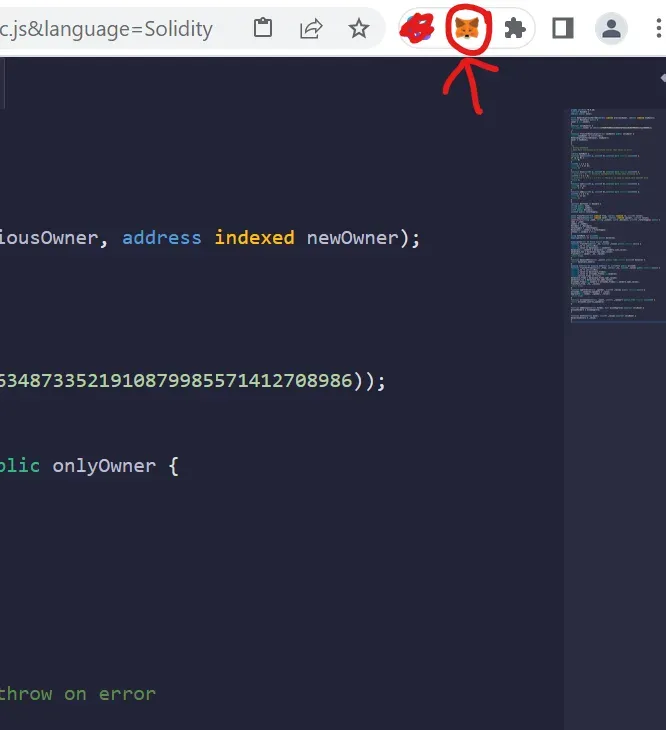
Click the “Not connected” button and connect it.
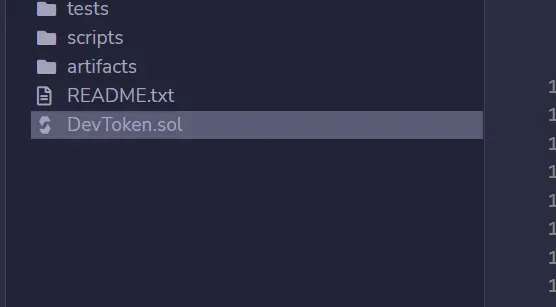
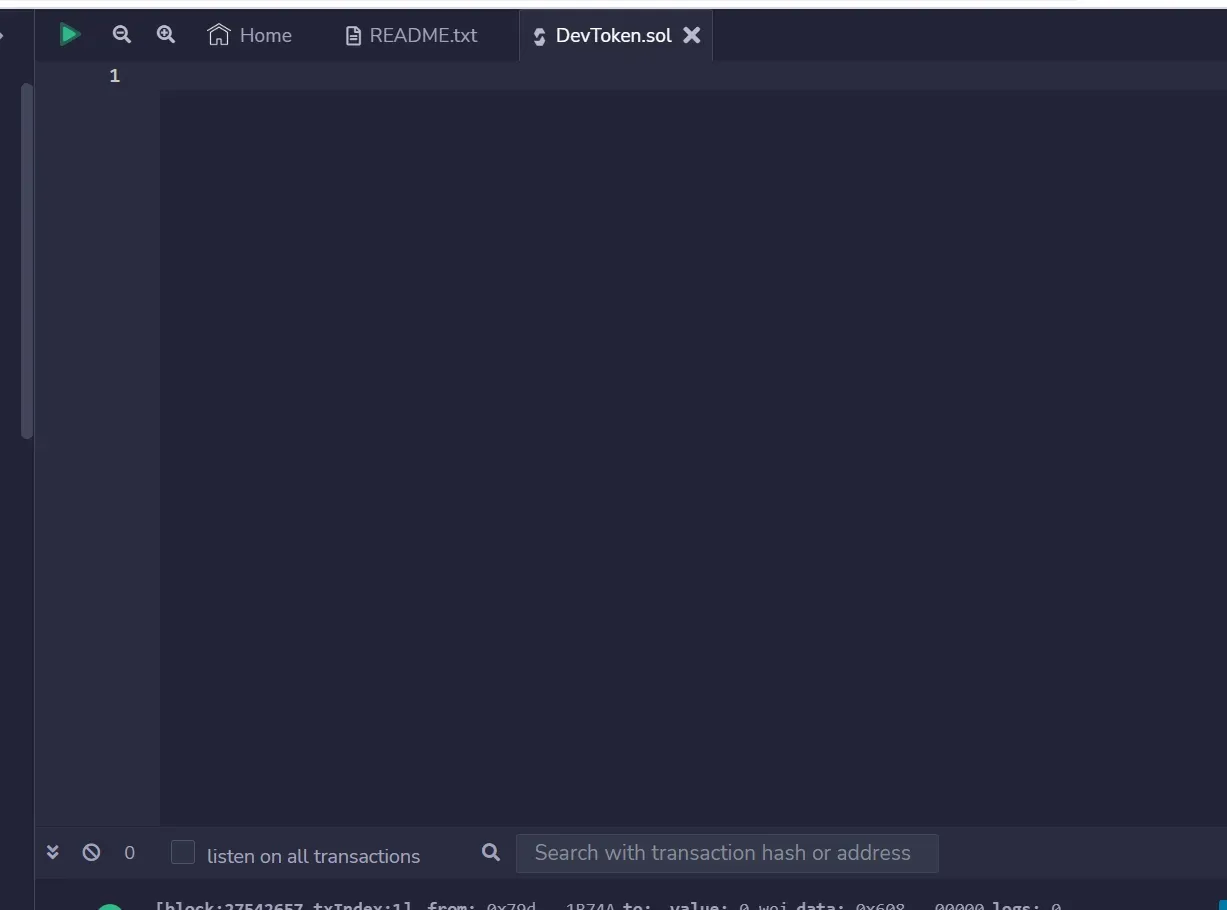
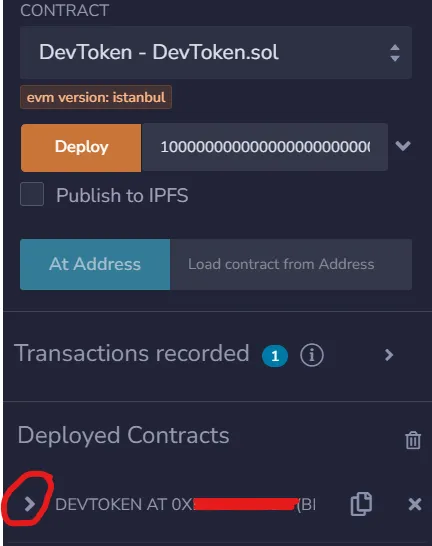
4.Back to REMIX IDE. Click Create New File.
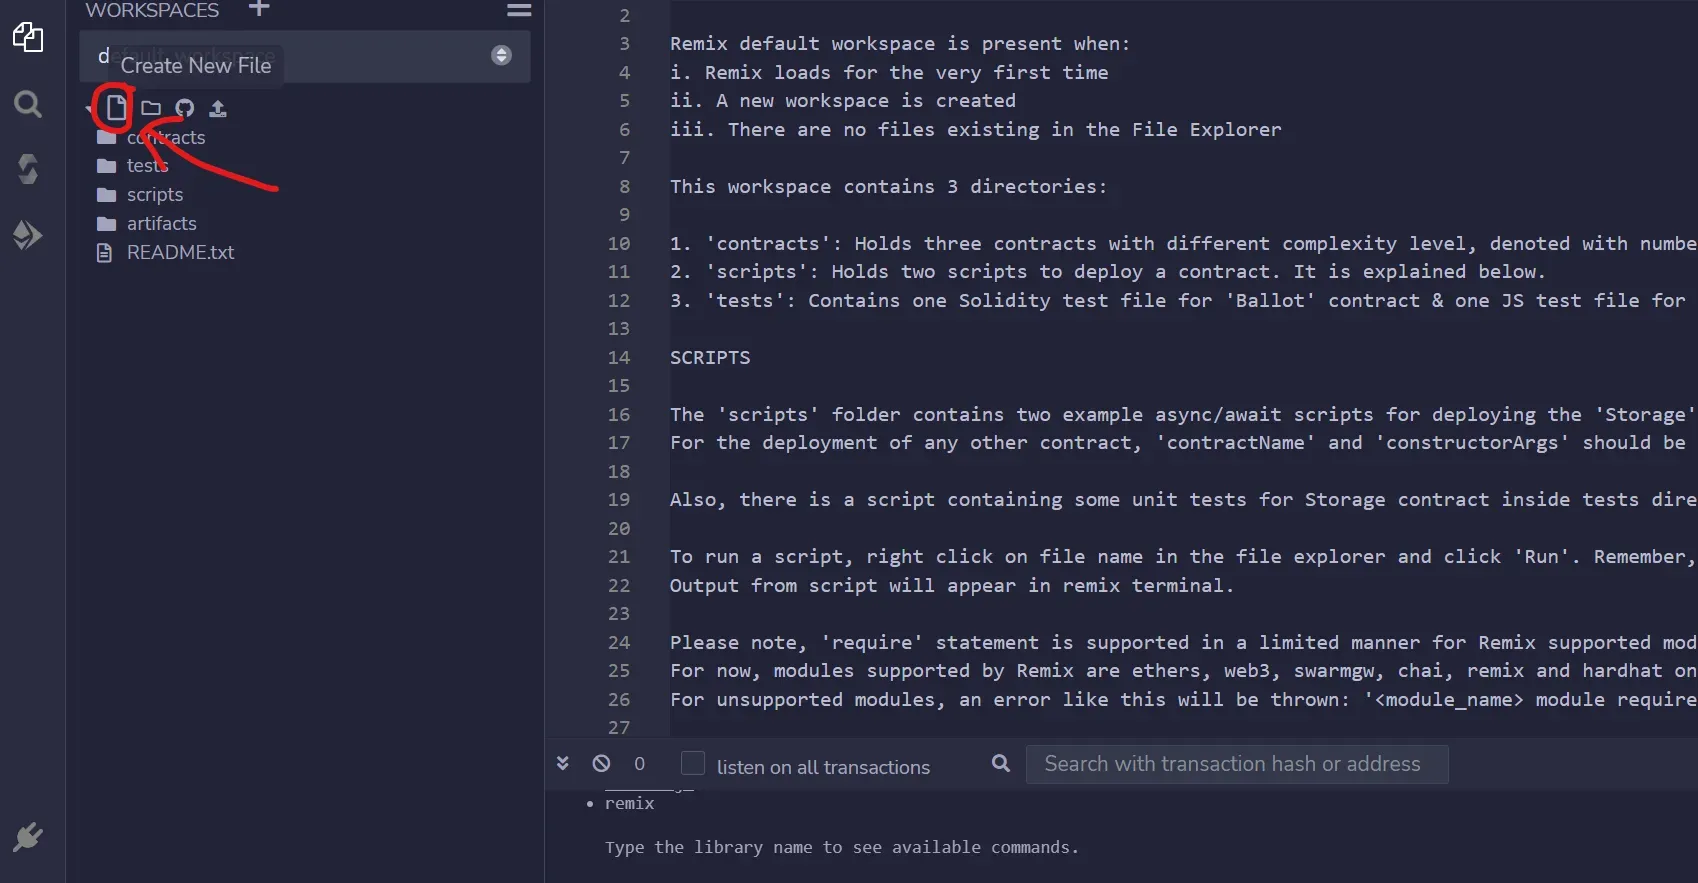
5.Name you file as you like, remember to add .sol at the back. EXAMPLE here, DevToken.sol
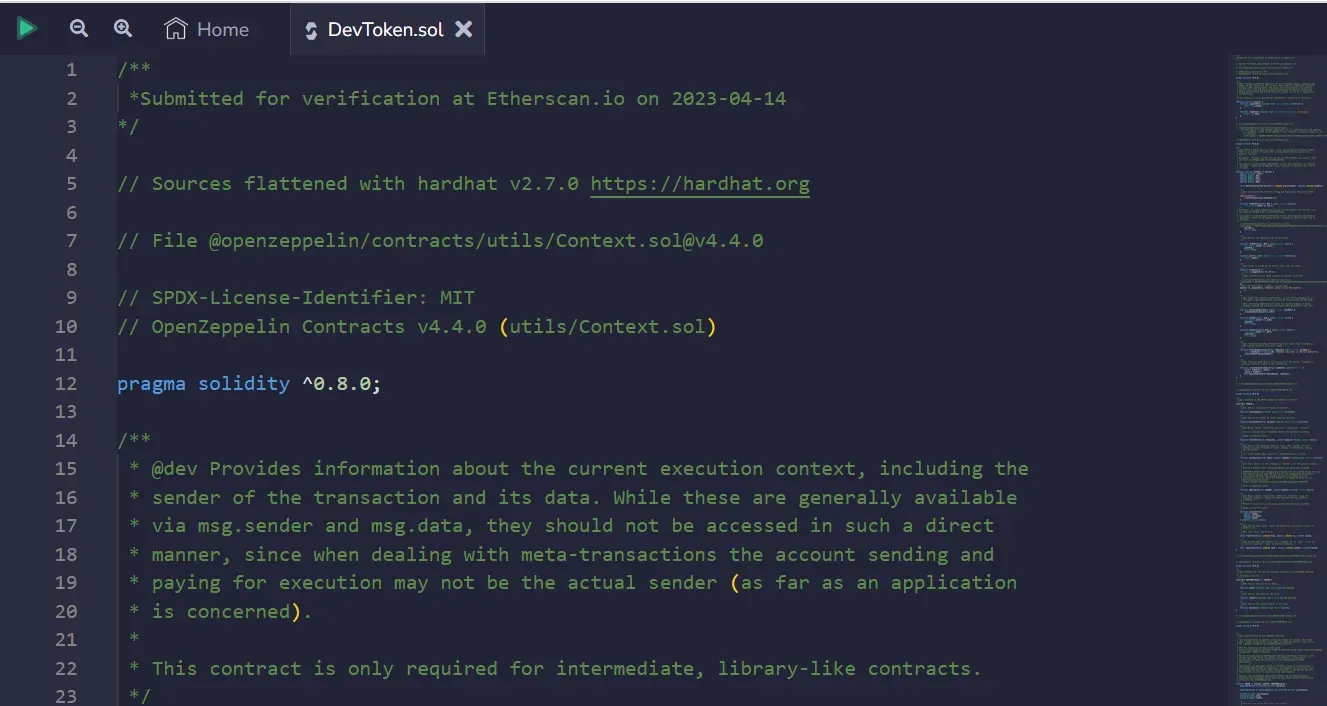
6. Copy and paste the code from the links into the space. *Do not attempt to change any code or else it won't work*
Non-Honeypot Normal Meme Token Smart Contract Code: Non-Honeypot, Normal Meme Token Like PEPE
Paste the code
7. Scroll down the smart contract code in Remix until you reach this row like the picture show below.
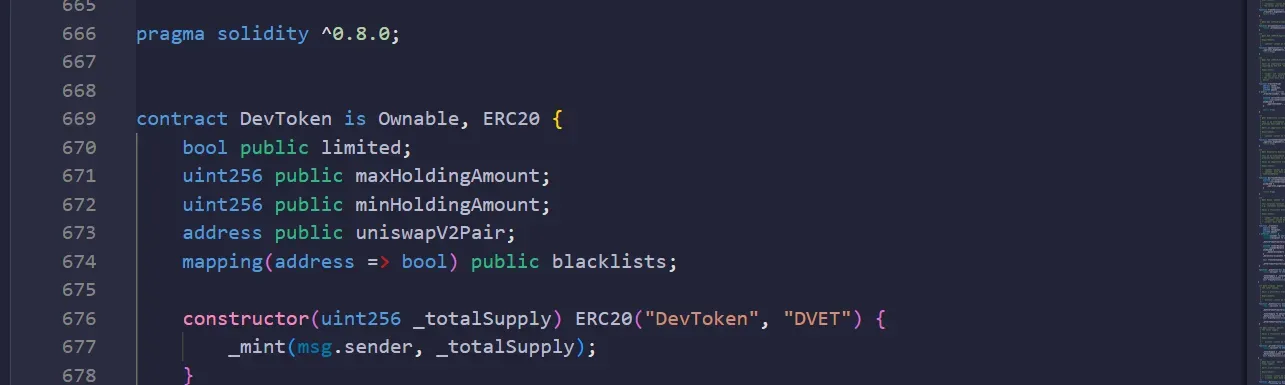
8. Now we are going to do some token setting.
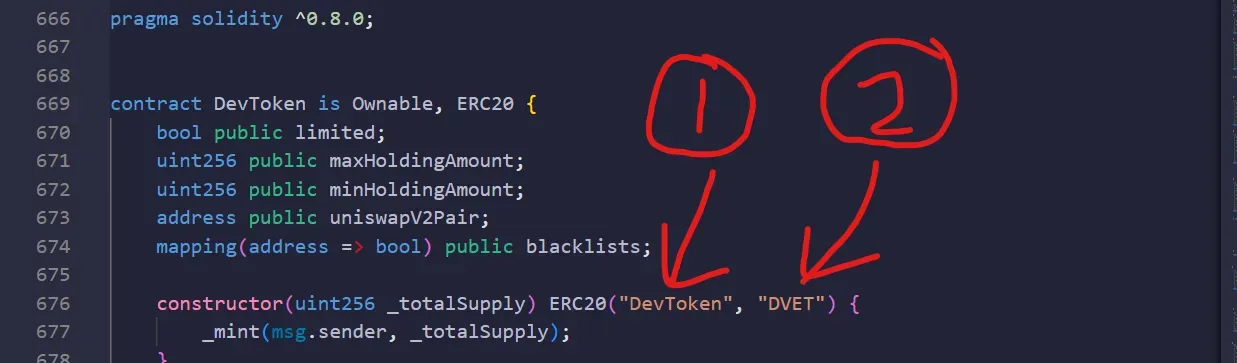
No 1 (First Red Arrow as shown in picture above): This is the Name of Your Token *Write token name inside the first bracket "xxxxx"
No 2 (Second Red Arrow as shown in picture above): This is the Symbol of Your Token *Write token symbol inside the bracket "XXX"
Total Supply: ? We will do the setting of the Total Supply of your token afterward.
After you done, we can move to new step.
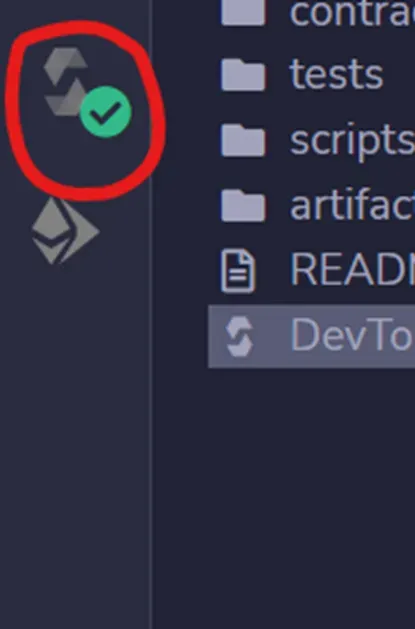
9. Click the icon on the left as shown below,
Select the compiler as below, 0.8.0
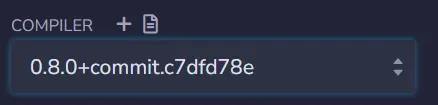
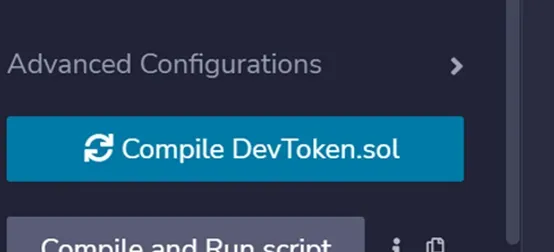
Then click compile.
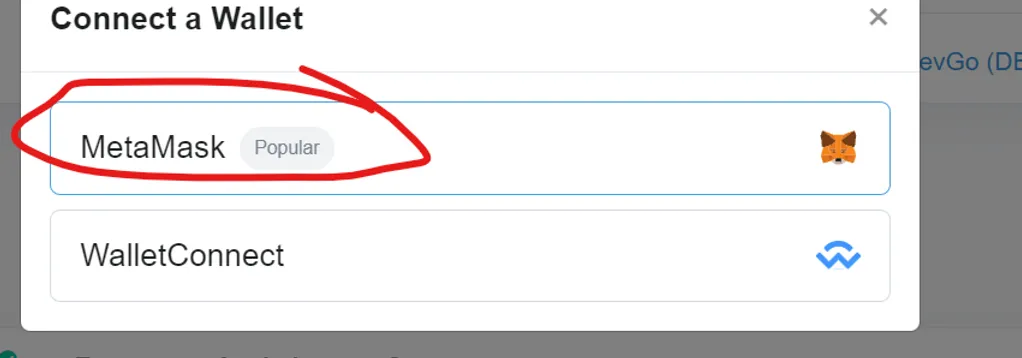
10. After compile. Click on the icon as shown below, and select Metamask on the Environment section (cuz we r using metamask wallet)
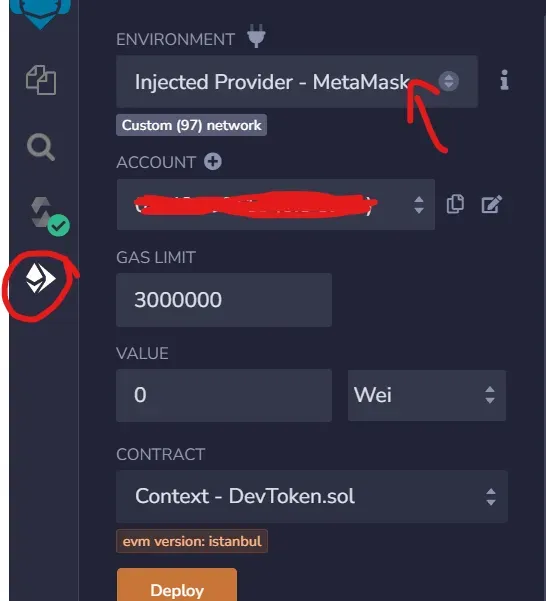
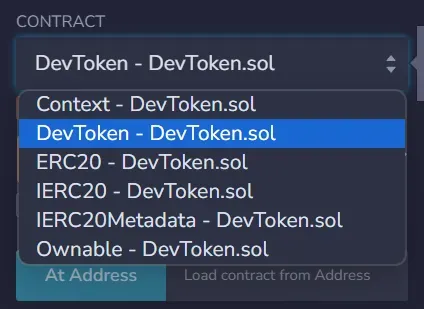
11. On Contract section, select DevToken as contract.
12. On the same page, we will start to do Token Setting on Total Supply of token.
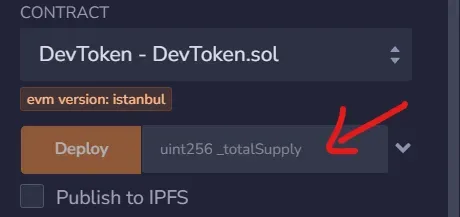
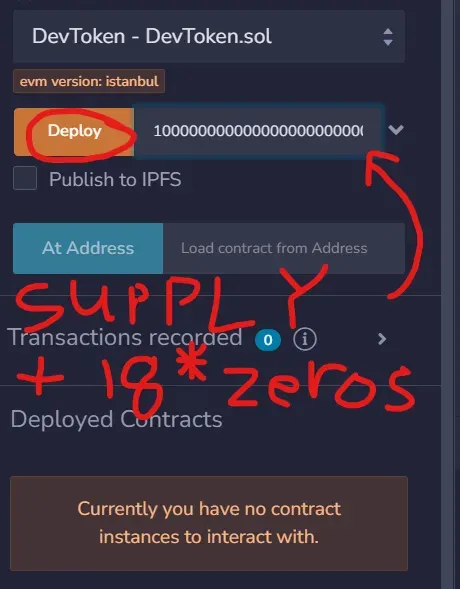
Total Supply: Set your total token supply inside the space as shown above. If you want 1000000 total supply, then type in 1000000000000000000000000, cuz 1000000 + 18*0)
*Write total supply inside the space as the red arrow shown above
*Add eighteen “0” after the quantity you want. For example, if you want to issue 1000000 tokens, the correct input should be 1000000000000000000000000
Click on Deploy after done writing token total supply.
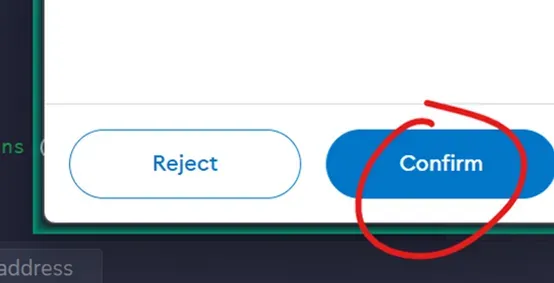
13. Click on confirm on the transaction on your metamask Pop-up. If nothing happen there, you need to connect metamask wallet to REMIX IDE.
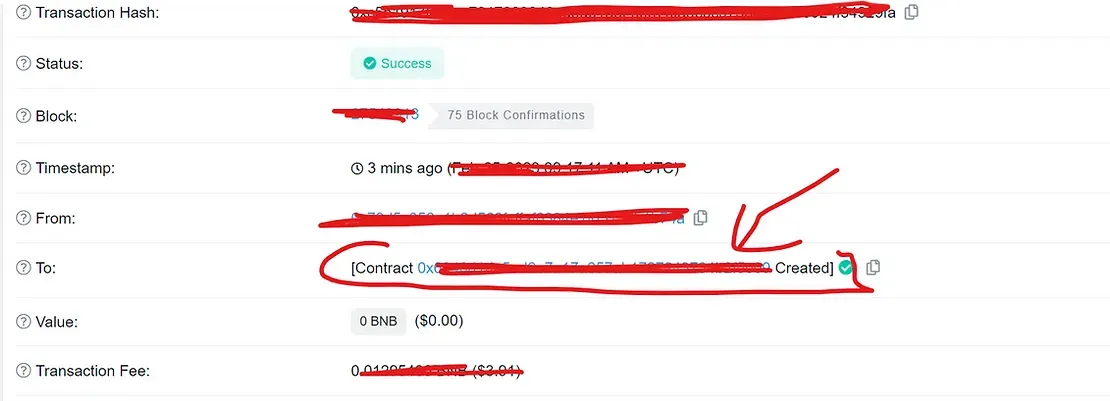
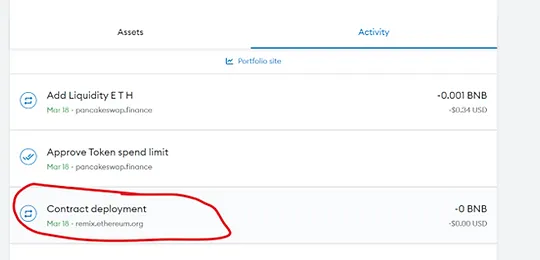
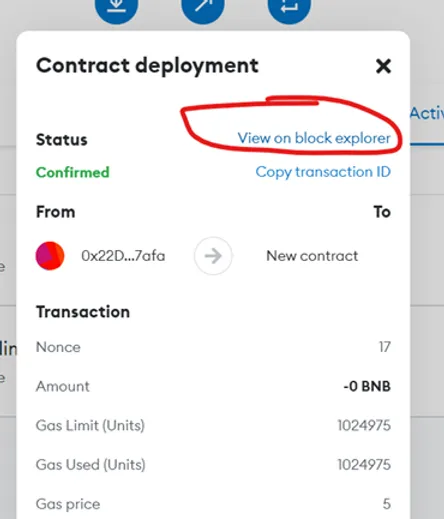
14. If everything go smoothly, your token is on its way. Back to metamask, go to Activity, click on the Contract deployment.
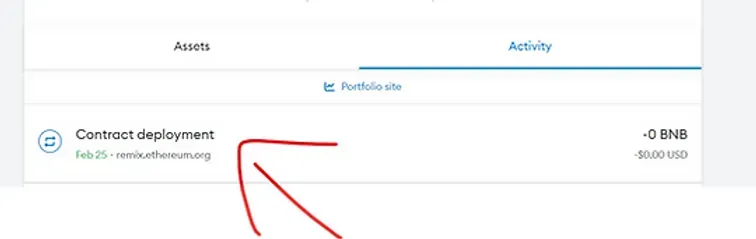
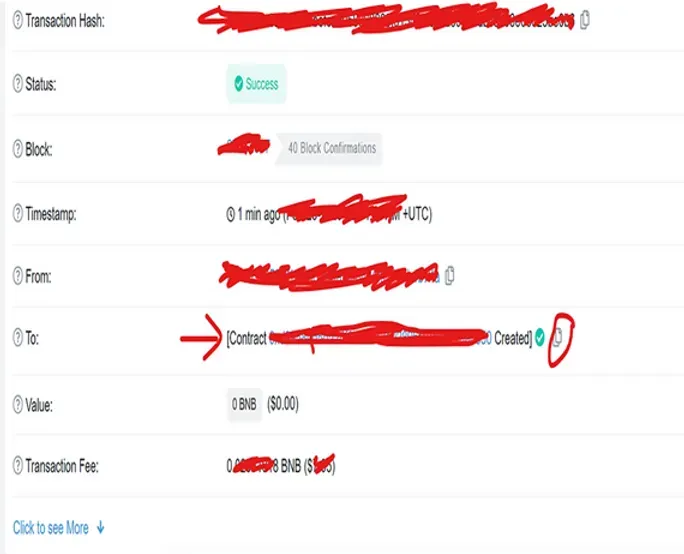
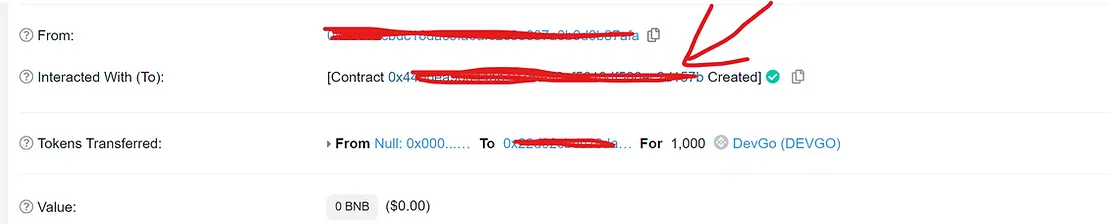
Click view on block explorer

Copy the contract address by clicking the [copy] icon button on the right.
15. Go back to metamask, click import token.
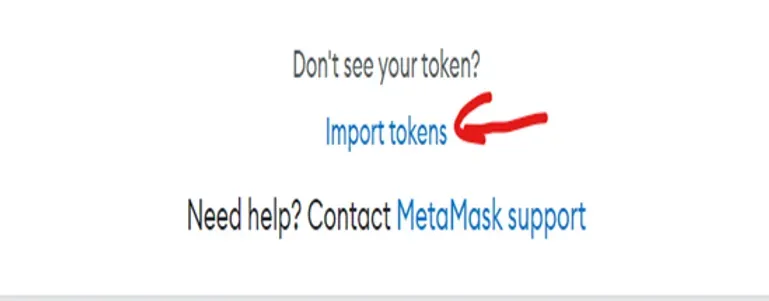
Select Custom token, and paste the contract address, and wait for your token to show up, then click add custom token

You can create tokens in ETH mainnet, Binance Smart Chain, Arbitrum One and any other chains using the same method.
🎉🎉🎉Congratulation! You successfully created your own token and they are in your wallet!
Dev, can we start to list our token?
Butttttt, we are not done yet…One more important step still require to finish..
Which is: Verify Contract
Part 2: Verify Your Contract
Hey Dev, why we need to verify contract? Why don’t we just list our token directly into any DEX (Decentralized exchange)?
Well, the reason to verify contract is to increase the popularity of the token, investors might shy away from token that is unverified and end up to not purchasing any tokens.
Let’s start to verify token now!
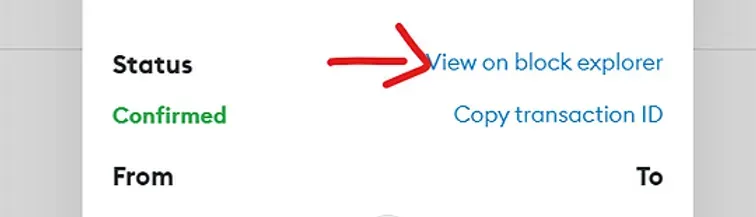
1. Back to metamask, go to Activity, click on the Contract deployment.

2. Click view on block explorer
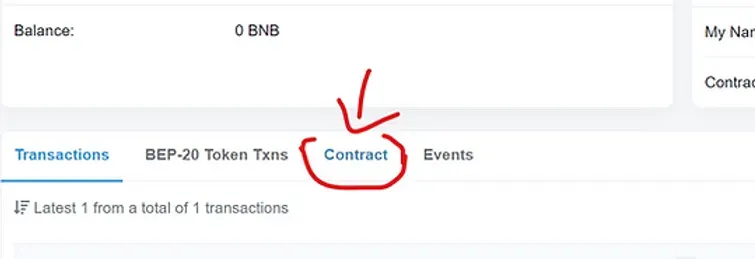
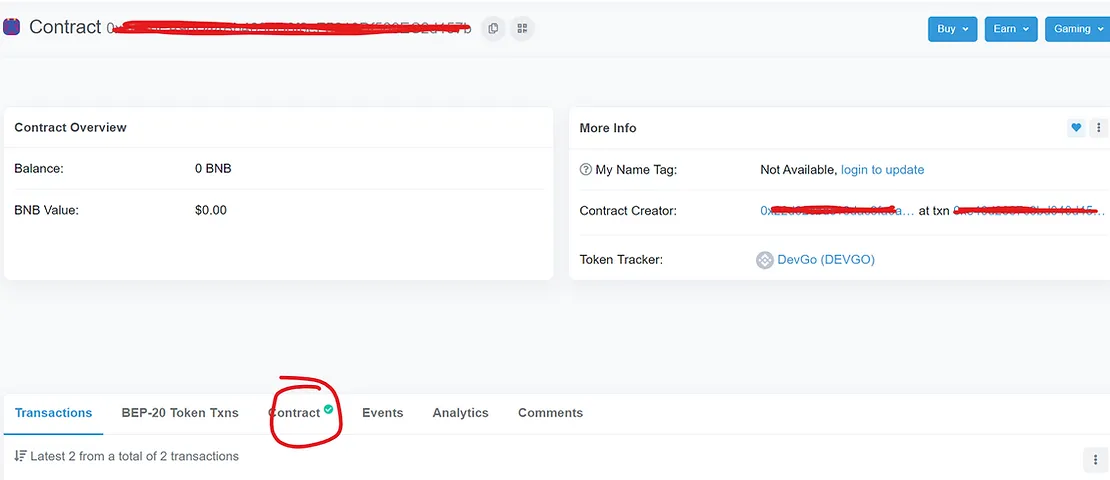
Click on the blue contract address
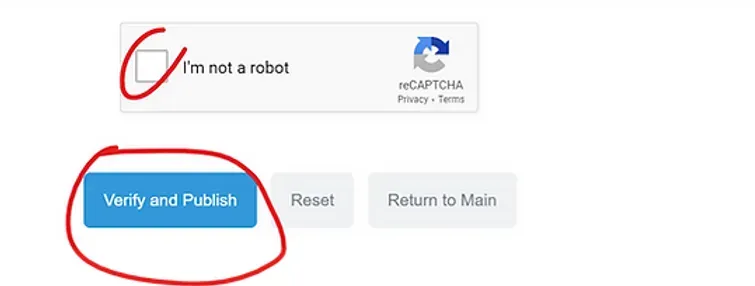
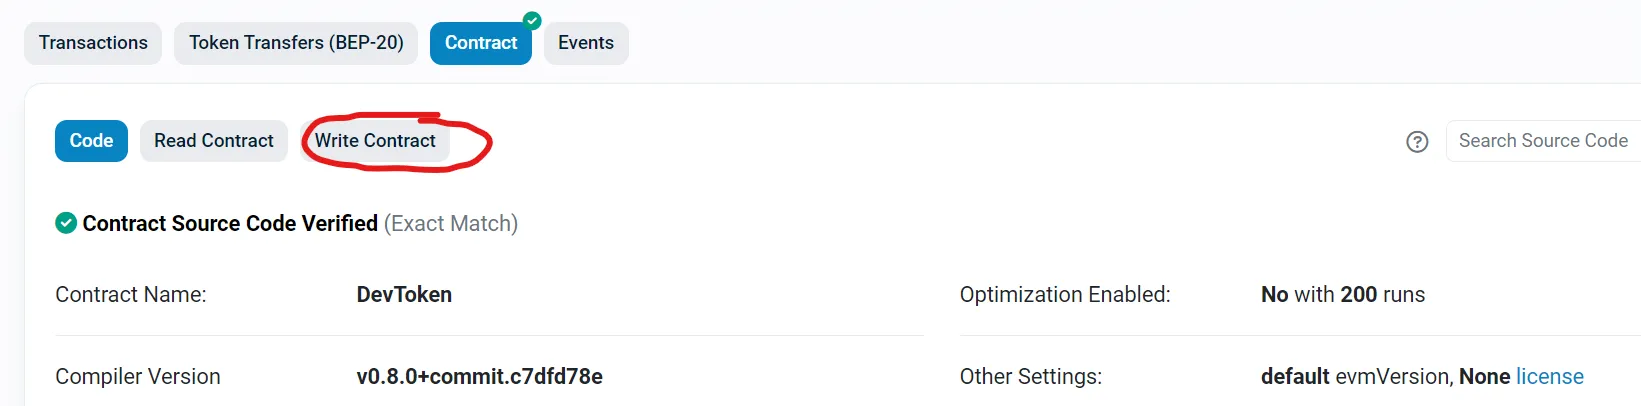
3. On this page, Click Contract
Click Verify and Publish

4. Next, we select the setting as below:
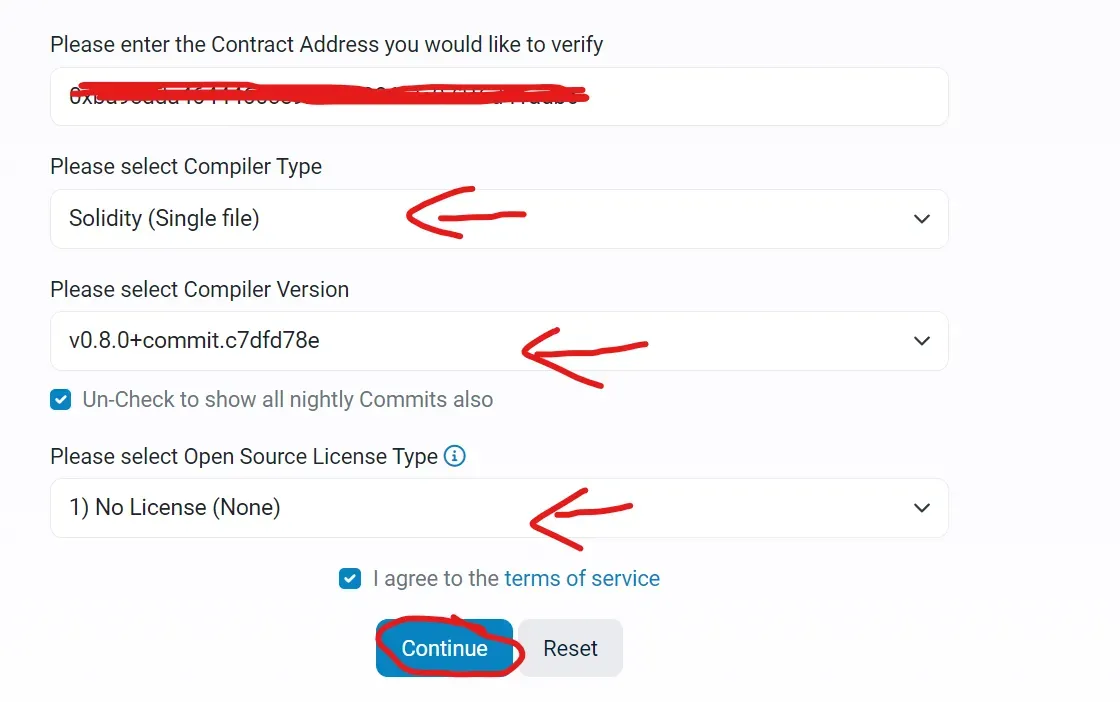
Compiler Type: Single File
Compiler version: 0.8.0
License Type: No license
Then click Continue
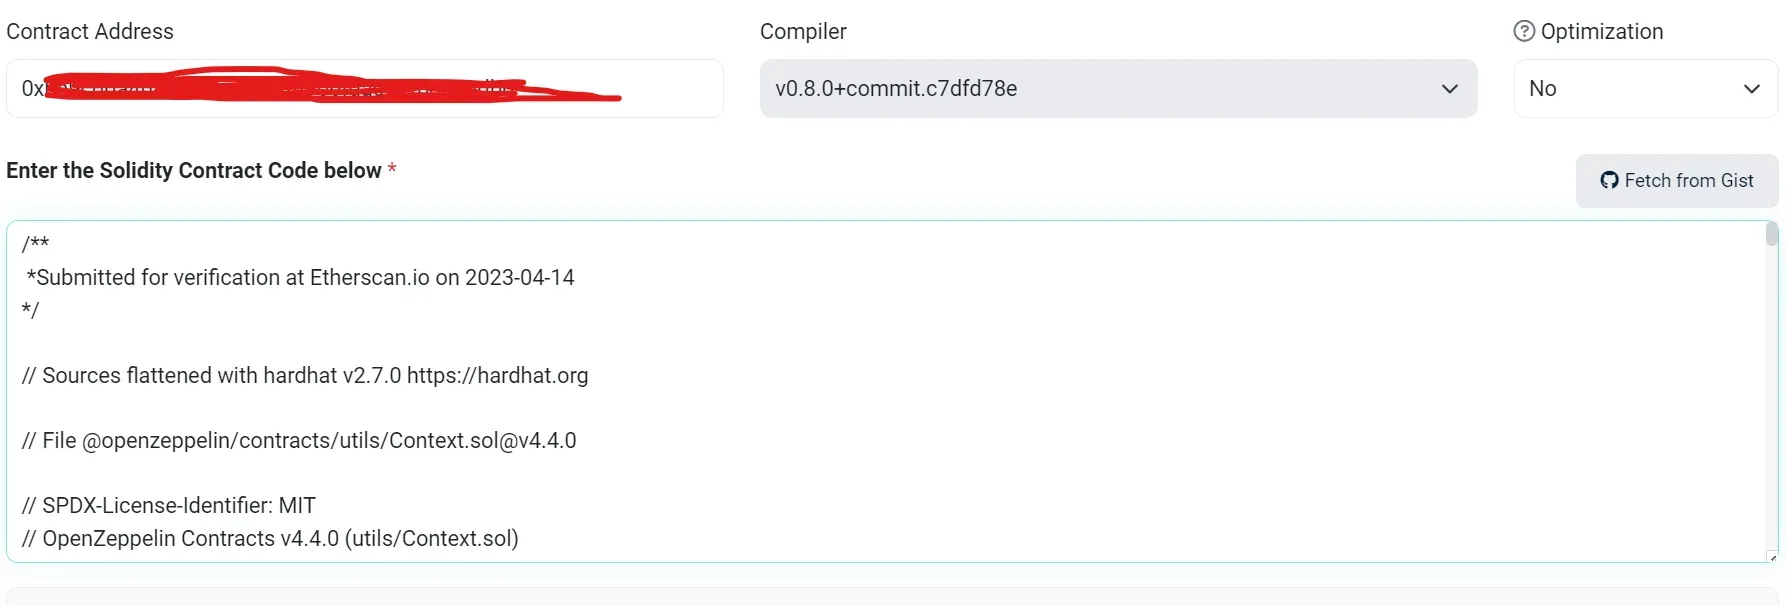
5. Then, go back to our source code, copy and paste it into the space
Finish the bot test and and publish it
6. You should see the success message as shown below, if not, something is wrong, you need to recheck all the steps if u fail to get this message.

Congratulation! Your contract is now verified and you can list your token in Decentralized Exchange (DEX) Listing.
If u use Ethereum mainnet, use Uniswap, link: https://app.uniswap.org/#/swap
If u use BSC (Binance Smart Chain), use Pancakeswap, link: https://pancakeswap.finance/
If you are using Pancakeswap on Binance Smart Chain, you can read this guide on how to add liquidity in Pancakeswap.
*How to Add Liquidity in Pancakeswap: http://tokensourcecode.top/tips/how-to-add-remove-liquidity-in-pancakeswap-binance-smart-chain
In below, we will talk about How to Add Liquidity in Uniswap in Ethereum Mainnet:
In here, we use Uniswap in Ethereum Mainnet.
1. First, Go to Uniswap website: https://app.uniswap.org/#/swap
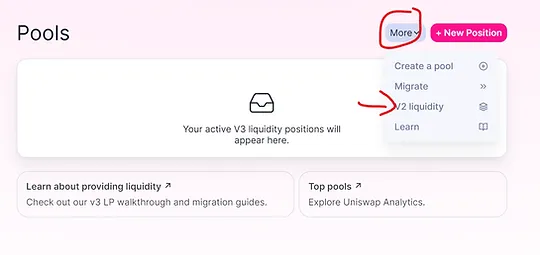
2. Click Pool

3. Click More, then click V2 Liquidity
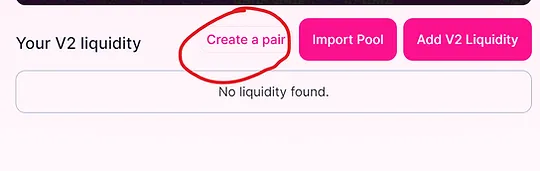
4. Click Create a pair
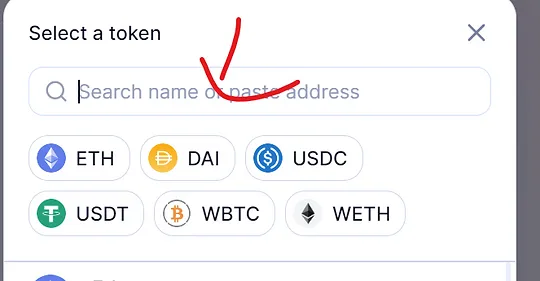
5. Click select a token.
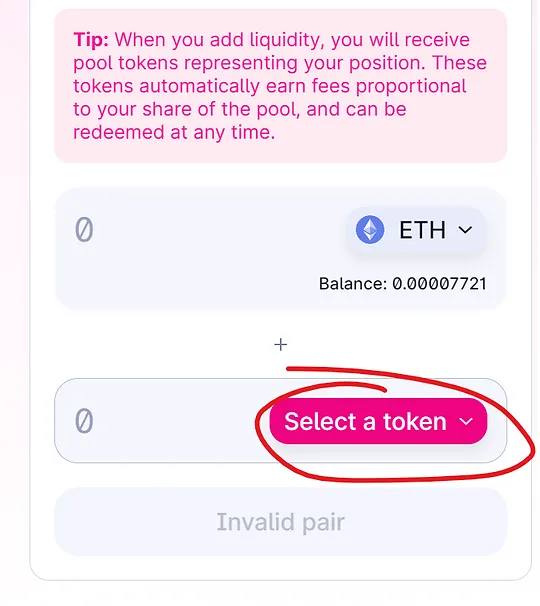
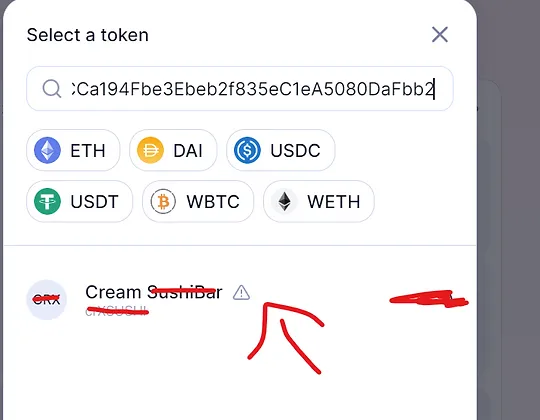
6. Copy and paste contract address into the space, wait for your token to show up
7. Click on your token.
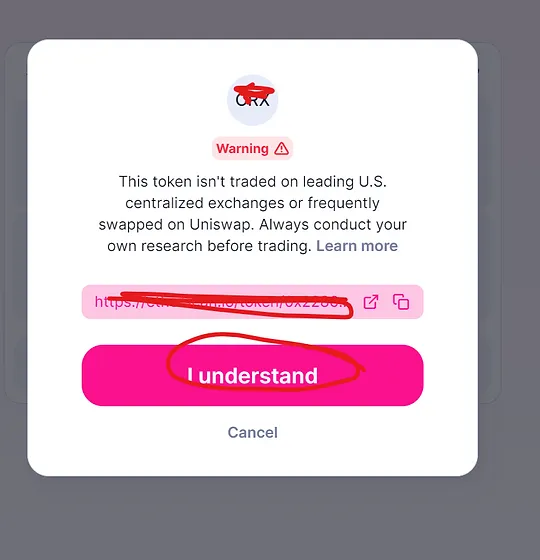
8. Click (I understand)
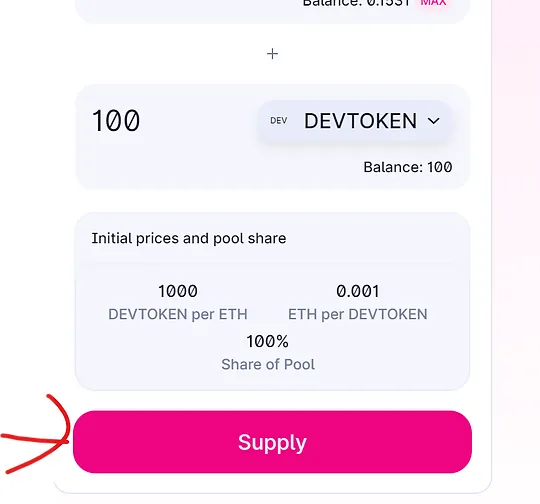
9. Select your eth input and token input. For example, if u wanna to list 100 of your token with 2 eth, then your initial token price will be 0.02 eth per your token. After it, click Approve.
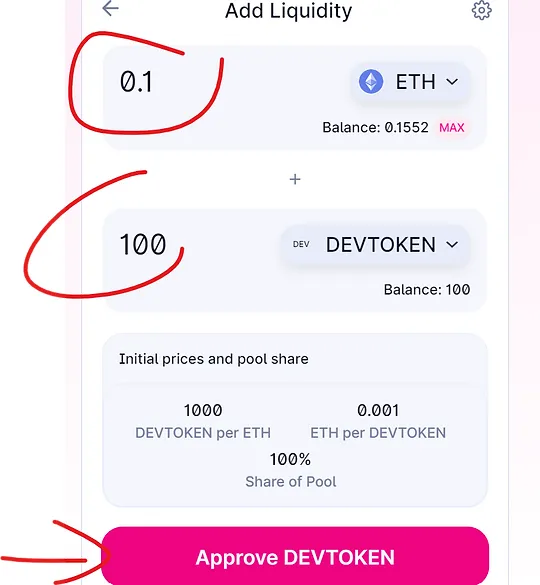
10. Click Supply and confirm the transaction, your token will be listed on Uniswap.
Congratulation, your tokens are now listed in Uniswap. You can begin your token project and campaign, find more investors to invest in your token.
If u use BSC (Binance Smart Chain), use Pancakeswap, link: https://pancakeswap.finance/
If you are using Pancakeswap on Binance Smart Chain, you can read this guide on how to add liquidity in Pancakeswap.
*How to Add Liquidity in Pancakeswap: http://tokensourcecode.top/tips/how-to-add-remove-liquidity-in-pancakeswap-binance-smart-chain
I will explain how to use this Normal Pepe Meme Token in details because it requires some steps to Enable Trading in order to let investors & traders buy and sell those tokens.
Part 3: Enable Trading of Your Tokens
Before we proceed to step #1, you Need to Add Liquidity First with the token created.
How to Add Liquidity?
If u use Ethereum mainnet, use Uniswap, link: https://app.uniswap.org/#/swap
If u use BSC (Binance Smart Chain), use Pancakeswap, link: https://pancakeswap.finance/
If you are using Pancakeswap on Binance Smart Chain, you can read this guide on how to add liquidity in Pancakeswap.
*How to Add Liquidity in Pancakeswap: http://tokensourcecode.top/tips/how-to-add-remove-liquidity-in-pancakeswap-binance-smart-chain
Now you need to enable the trading of your token, in order for users to start buying your tokens.
*IF YOU DON’T ENABLE TRADING OF YOUR TOKEN, NOBODY CAN BUY OR SELL YOUR TOKENS AFTER YOU ADD LIQUIDITY, SO MAKE SURE YOU FOLLOW THOSE STEPS BELOW CAREFULLY
How to Enable Trading? (Make sure you already Add Liquidity to your tokens)
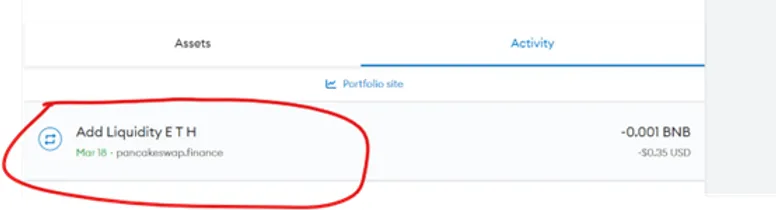
1. Back to Metamask wallet, go to Activity, Click Add Liquidity to view transaction
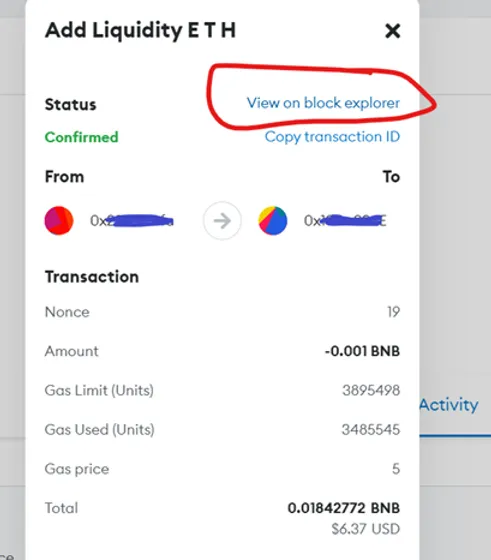
2. Click View on block explorer
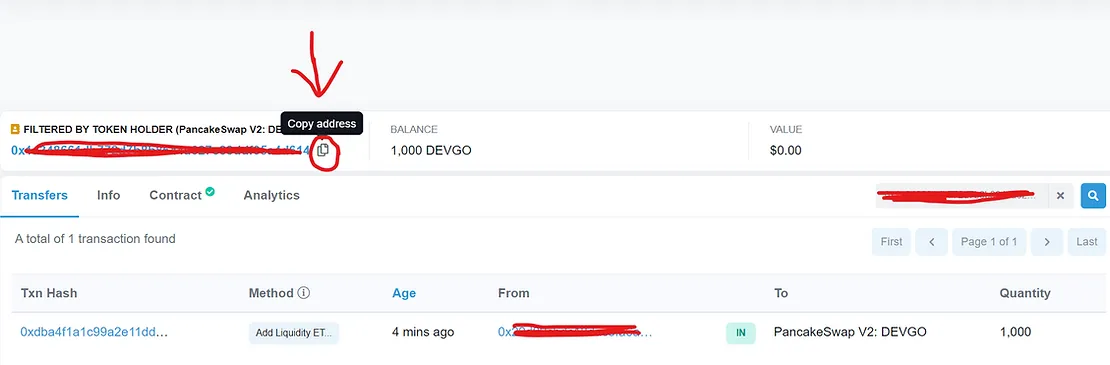
3.Click your LP tokens (as showed in picture below, just the blue text in the red bracket)

4. Copy address of your LP tokens
5. Now back to Remix IDE, click the little triangle arrow as showed below.
6. Click the small triangle arrow of the setRule button
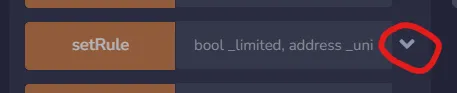
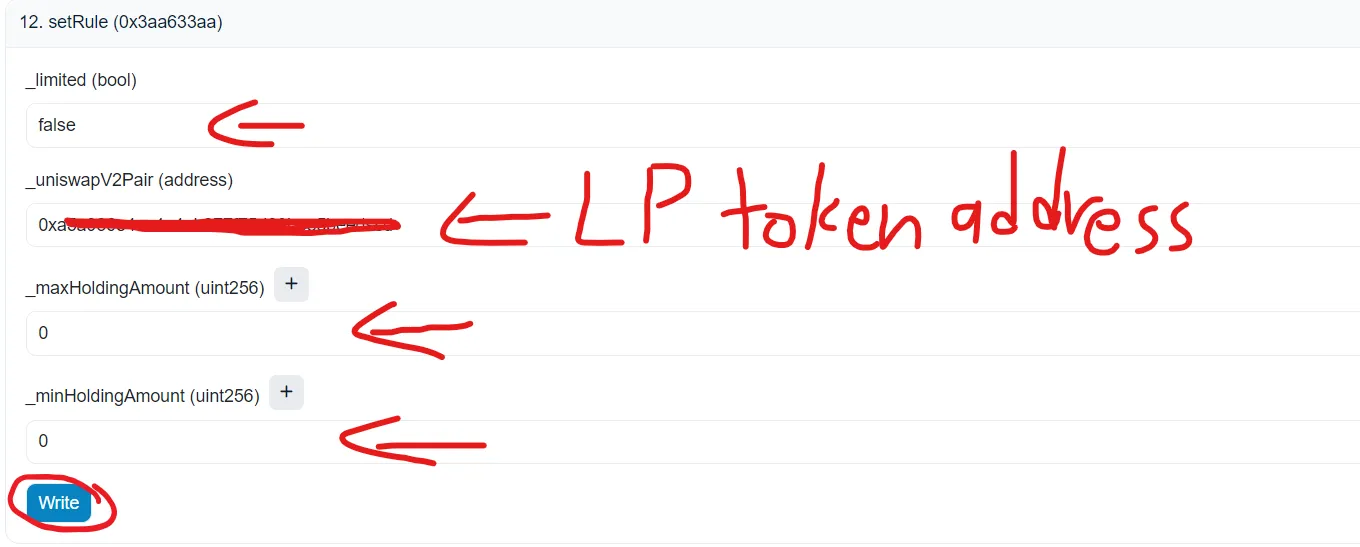
7. Write & Fill in the information into the spaces:
limited: false
uniswapV2Pair: *Paste the address of the LP token into the space
maxHoldingAmount: 0
minHoldingAmount: 0
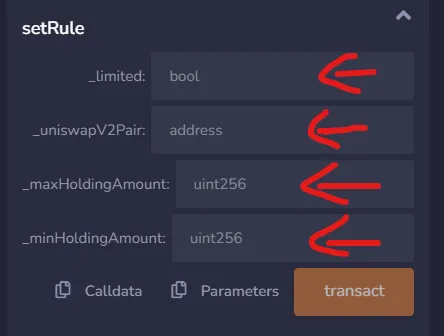
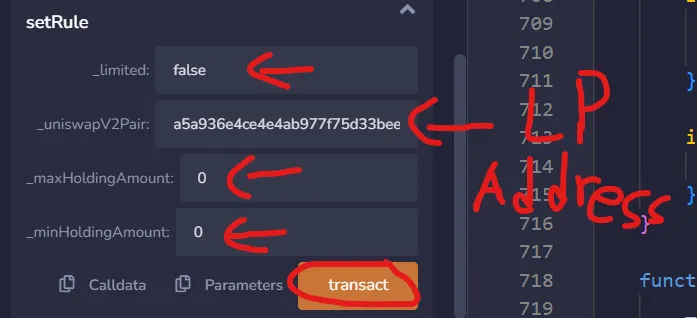
After you done the above, click transact button and confirm the transaction.
Congratulation, you are now Enable Trading for your tokens successfully, traders and investors are able to buy and sell your tokens now!
Remember this is a normal token (Not a honeypot token) which traders and investors are able to buy and sell your tokens freely.
*Important Step (If you already Enable Trading before, you can ignore this step)
If you close your Remix IDE accidentally, what should you do? How do you continue to do Enable Trading of you tokens? (If you already Enable Trading before, you can ignore this step)
*IF YOU DON’T ENABLE TRADING OF YOUR TOKEN, NOBODY CAN BUY OR SELL YOUR TOKENS AFTER YOU ADD LIQUIDITY, SO MAKE SURE YOU FOLLOW THOSE STEPS BELOW CAREFULLY
Needless to worry, I got your back. Follow the step below.
1. Back to Metamask,Click activity, Click Contract Deployment, Click View on block explorer
2. Click the blue text contract address
3. In this page,Click Contract.
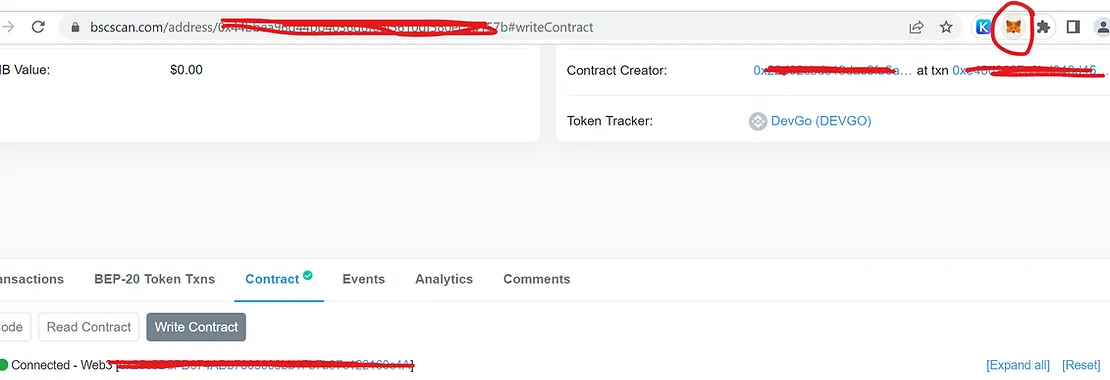
4. Click Write Contract
5. Click Connect to Web3 to connect your Metamask Wallet.

6. Click Metamask pluggin on the top right to check connectivity. Make sure the connected metamask wallet address is the contract owner / token creator.
7.Click setRule to Enable Trading (If you already Enable Trading before, you can ignore this step). Make sure the connected metamask wallet address is the contract owner/ token creator.

Write & Fill in the information into the spaces:
limited: false
uniswapV2Pair: *Paste the address of the LP token into the space
maxHoldingAmount: 0
minHoldingAmount: 0
After you done the above, click Write button and confirm the transaction.
Congratulation, you are now Enable Trading for your tokens successfully, traders and investors are able to buy and sell your tokens now!
Remember this is a normal token (Not a honeypot token) which traders and investors are able to buy and sell your tokens freely.
*Remember, this post is for testing and educational purpose only, you may try this at home since this is a NORMAL TOKEN*
So Dev, what if I want to withdraw my liquidity and tokens back? What to do?
Oh, it is pretty simple, let’s go to the next step: Remove Liquidity
If u use Ethereum mainnet, use Uniswap, link: https://app.uniswap.org/#/swap
If you are using Pancakeswap on Binance Smart Chain, you can read this guide on how to add/remove liquidity in Pancakeswap
*How to Add/Remove Liquidity in Pancakeswap: http://tokensourcecode.top/tips/how-to-add-remove-liquidity-in-pancakeswap-binance-smart-chain
We will make an example here in Uniswap (Ethereum Mainnet)
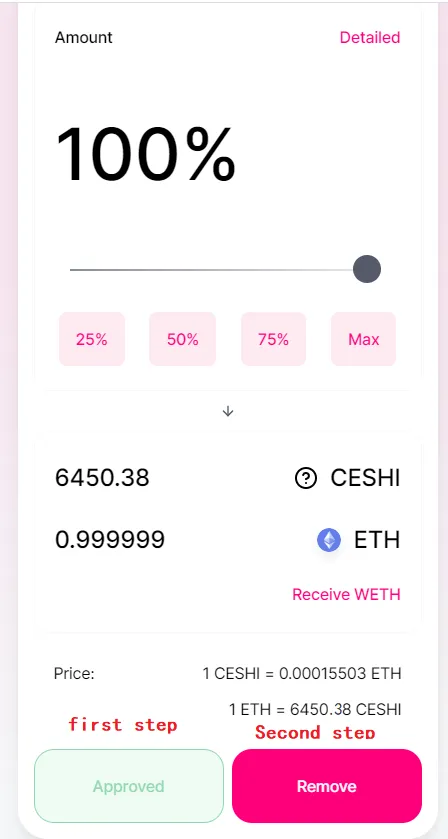
1. If you want to get the eth back, click the liquid pool, you will see the pair you created, and then click remove
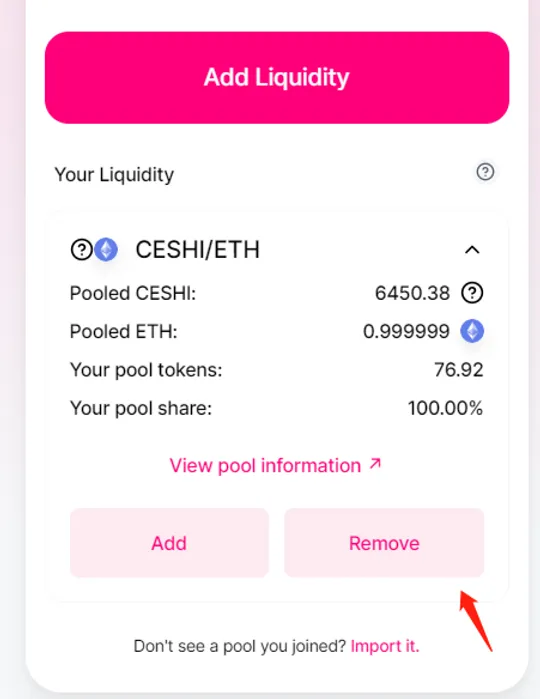
2. If u want to withdraw it all, Select max, click approve, click remove, you get your token back.
That is all from in my opinion. Ofcuz, this is not the end, there are many ways and techniques you can do with this token in order to maximize the effect.
We will discuss more about token tips and techniques in our next post.
Good luck with your tokens!
Copy Non-Honeypot Normal Meme Token Smart Contract Code Now:
http://tokensourcecode.top/codes/honeypot_code_2
Learn How Much Liquidity You Should Add & What To Do (Recommended for Honeypot tokens Only):
http://tokensourcecode.top/tips/little-techniques-on-marketing-your-tokens
Learn How to Attract People to Buy Your Tokens (Recommended for Honeypot tokens Only):
http://tokensourcecode.top/tips/little-techniques-on-marketing-your-tokens
Any queries?
Contact me on Telegram: https://t.me/VictorPinard
My website: http://tokensourcecode.top